创建自定义访问令牌 (Access token) 脚本
要添加自定义声明 (Claims)到访问令牌 (Access token),你需要提供一个返回包含这些声明 (Claims) 的对象的脚本。该脚本应编写为一个返回自定义声明 (Claims) 对象的 JavaScript 函数。
-
进入 控制台 > 自定义 JWT。
-
你可以为以下两种不同类型的访问令牌 (Access token) 自定义访问令牌 (Access token) 声明 (Claims):
- 用户访问令牌 (User access token):为终端用户签发的访问令牌 (Access token)。例如,Web 应用或移动应用。
- 机器对机器 (Machine-to-Machine) 访问令牌 (Access token):为服务或应用程序签发的访问令牌 (Access token)。例如,机器对机器应用。
不同类型的访问令牌 (Access token) 可能具有不同的令牌负载上下文。你可以分别为每种类型的访问令牌 (Access token) 自定义令牌声明 (Claims)。
选择你想自定义令牌声明 (Claims) 的任意一种访问令牌 (Access token) 类型,并点击 添加自定义声明 (Claims) 按钮以创建新脚本。
自定义令牌声明 (Claims) 功能仅对以下用户开放:
- Logto OSS 用户
- 拥有开发环境的 Logto Cloud 租户
- 拥有生产环境的 Logto Cloud 付费租户(包括 Pro 租户和企业租户)
实现 getCustomJwtClaims() 函数
在 自定义 JWT 详情页,你可以找到脚本编辑器来编写你的自定义令牌声明 (Claims) 脚本。该脚本应为一个返回自定义声明 (Claims) 对象的 JavaScript 函数。
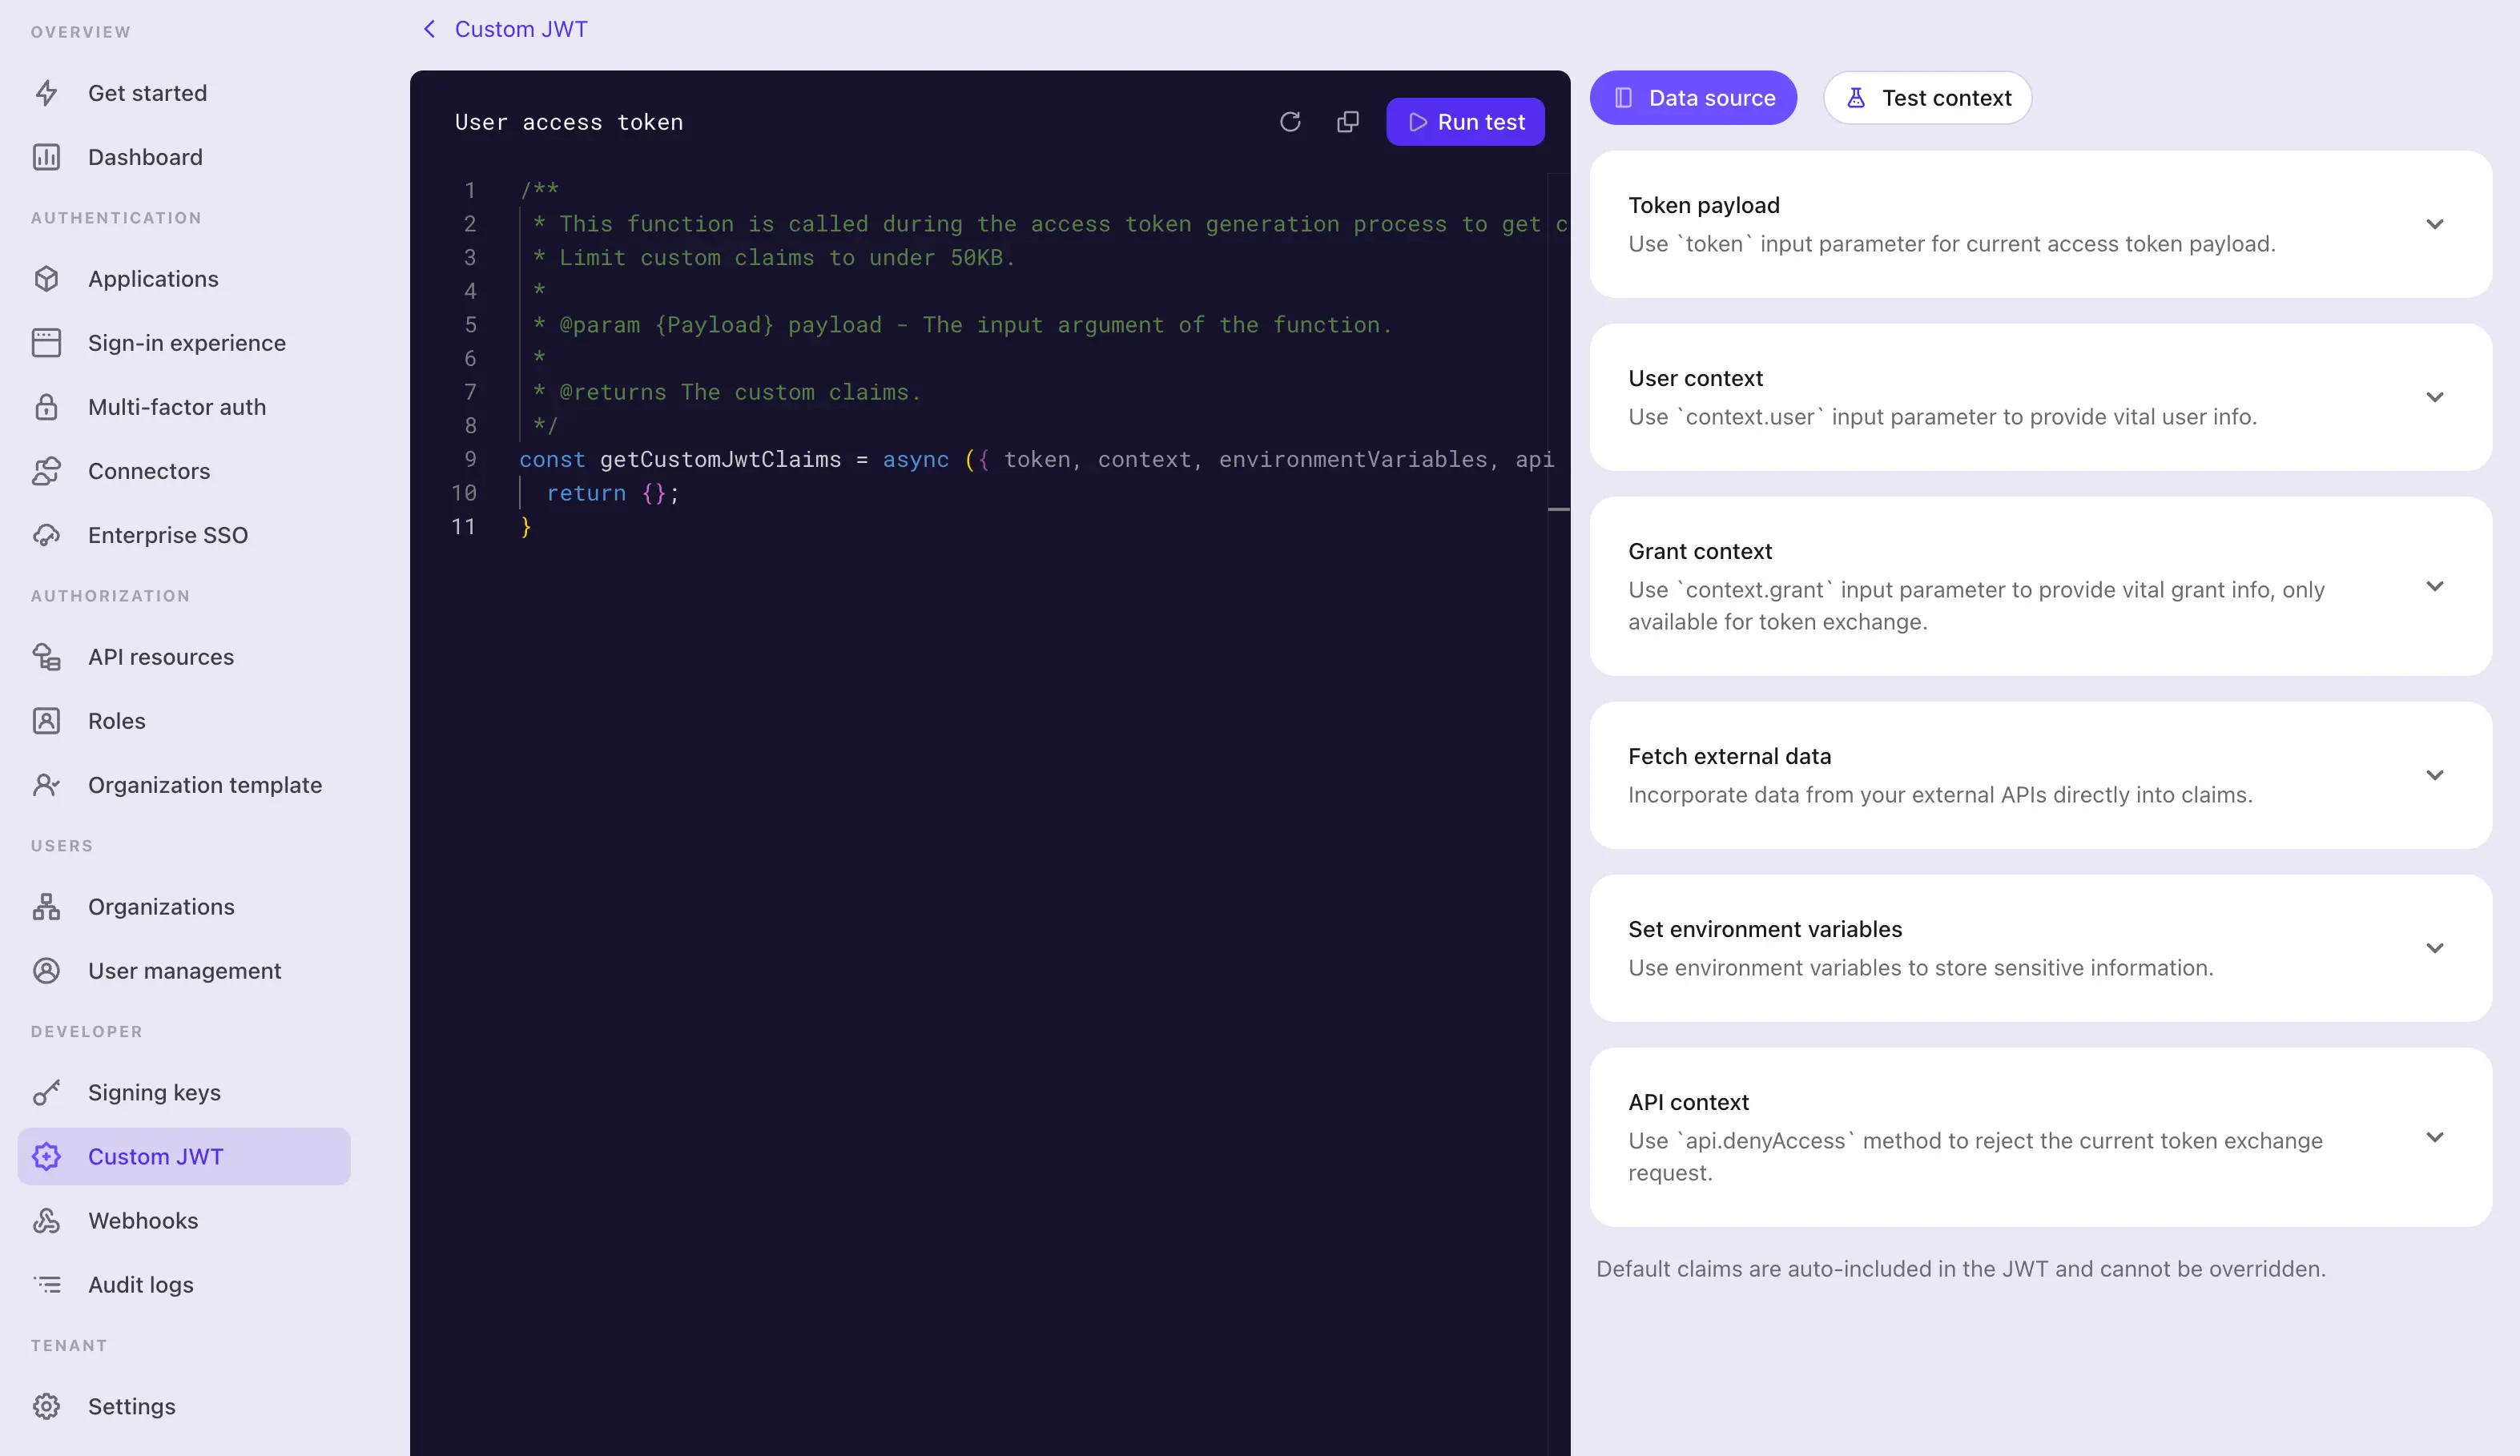
第一步:编辑脚本
使用左侧的代码编辑器修改脚本。系统为你提供了一个默认返回空对象的 getCustomJwtClaims,你可以在此基础上修改函数以返回你自己的自定义声明 (Claims) 对象。
const getCustomJwtClaims = async ({ token, context, environmentVariables }) => {
  return {};
};
该编辑器使用 JavaScript 语言服务器,提供基础语法高亮、代码补全和错误检查。输入参数类型完善,并采用 jsDoc 风格文档。你可以利用编辑器的 IntelliSense 正确访问输入对象的属性。你可以在页面右侧找到详细的参数定义。
该函数将作为模块导出。请确保函数名保持为 getCustomJwtClaims,以便模块能正确导出该函数。
第二步:输入参数
getCustomJwtClaims 函数接收一个对象作为输入参数。输入对象包含以下属性:
token
令牌负载对象。该对象包含原始令牌声明 (Claims) 和你可能需要在脚本中访问的元数据。
你可以在页面右侧找到令牌负载对象和用户数据对象的详细类型定义。编辑器的 IntelliSense 也会帮助你正确访问输入对象的这些属性。
- 用户访问令牌 (User access token) 数据对象
属性 描述 类型 jti唯一 JWT id stringaud令牌受众 (Audience) stringscope令牌权限 (Scopes) stringclientId令牌客户端 id stringaccountId令牌用户 id stringexpiresWithSession令牌是否随会话过期 booleangrantId当前认证 (Authentication) 授权 (Authorization) grant id stringgty令牌授权类型 stringkind令牌类型 AccessToken - 机器对机器访问令牌 (Machine-to-machine access token) 数据对象
属性 描述 类型 jti唯一 JWT id stringaud令牌受众 (Audience) stringscope令牌权限 (Scopes) stringclientId令牌客户端 id stringkind令牌类型 ClientCredentials
context(仅用户访问令牌 (User access token) 可用)
context 对象包含与当前授权 (Authorization) 过程相关的用户数据和 grant 数据。
-
用户数据对象 对于用户访问令牌 (User access token),Logto 提供了额外的用户数据上下文供你访问。用户数据对象包含你设置自定义声明 (Claims) 可能需要的所有用户资料数据和组织 (Organization) 成员数据。详见 用户 和 组织 (Organizations)。
-
Grant 数据对象 对于通过模拟 (Impersonation) 令牌交换获得的用户访问令牌 (User access token),Logto 提供了额外的 grant 数据上下文。grant 数据对象包含来自主体 (Subject) 令牌的自定义上下文。详见 用户模拟 (User impersonation)。
-
用户交互数据对象 对于给定的用户访问令牌 (User access token),有时你需要访问当前授权 (Authorization) 会话的用户交互详情。例如,你可能需要获取用户用于登录的企业单点登录 (Enterprise SSO) 身份。该用户交互数据对象包含最近一次用户提交的交互数据,包括:
属性 描述 类型 interactionEvent当前用户交互的事件 SignIn或RegisteruserId当前用户交互的用户 id stringverificationRecords用户在交互过程中提交的用于识别和验证身份的验证记录列表 VerificationRecord[]验证记录类型:
// VerificationType.Password
{
  id: string;
  type: 'Password';
  identifier: {
    type: 'username' | 'email' | 'phone' | 'userId';
    value: string;
  }
  verified: boolean;
}
// VerificationType.EmailVerificationCode
{
id: string;
templateType: 'SignIn' | 'Register' | 'ForgotPassword' | 'Generic';
verified: boolean;
type: 'EmailVerificationCode';
identifier: {
type: 'email';
value: string;
}
}// VerificationType.PhoneVerificationCode
{
id: string;
templateType: 'SignIn' | 'Register' | 'ForgotPassword' | 'Generic';
verified: boolean;
type: 'PhoneVerificationCode';
identifier: {
type: 'phone';
value: string;
}
}// VerificationType.Social
{
id: string;
type: 'Social';
connectorId: string;
socialUserInfo?: {
id: string;
email?: string | undefined;
phone?: string | undefined;
name?: string | undefined;
avatar?: string | undefined;
rawData?: Record<string, unknown> | undefined;
} | undefined;
}// VerificationType.EnterpriseSso
{
id: string;
type: 'EnterpriseSso';
connectorId: string;
enterpriseUserInfo?: {
id: string;
email?: string | undefined;
phone?: string | undefined;
name?: string | undefined;
avatar?: string | undefined;
[key: string]?: unknown;
} | undefined;
issuer?: string | undefined;
}// VerificationType.Totp (MFA)
{
id: string;
type: 'Totp';
userId: string;
verified: boolean;
}// VerificationType.WebAuthn (MFA)
{
id: string;
type: 'WebAuthn';
userId: string;
verified: boolean;
}// VerificationType.BackupCode (MFA)
{
id: string;
type: "BackupCode";
userId: string;
code?: string | undefined;
}// VerificationType.OneTimeToken
{
id: string;
type: "OneTimeToken";
verified: boolean;
identifier: {
type: "email";
value: string;
};
oneTimeTokenContext?: {
jitOrganizationIds?: string[] | undefined;
} | undefined;
}备注:用户交互数据对象中可能存在多条验证记录,尤其是用户经历了多次登录或注册流程时。
例如,用户先通过
Social验证记录登录,然后通过EmailVerificationCode验证记录绑定新邮箱,再通过Totp验证记录验证 MFA 状态。在这种情况下,你可能需要在脚本中分别处理所有验证记录。每种类型的验证记录在用户交互数据对象中只会出现一次。
environmentVariables
使用右侧的 设置环境变量 区域为你的脚本设置环境变量。你可以用这些变量存储敏感信息或配置数据,避免在脚本中硬编码。例如 API 密钥、密钥或 URL。
你在这里设置的所有环境变量都可以在脚本中使用。通过输入参数中的 environmentVariables 对象访问这些变量。
api
api 对象提供了一组实用函数,你可以在脚本中用于对令牌签发过程进行额外访问控制。api 对象包含以下函数:
api.denyAccess(message?: string): void
api.denyAccess() 函数允许你通过自定义消息拒绝令牌签发过程。你可以用此函数对令牌签发过程进行额外访问校验。
第三步:获取外部数据
你可以在脚本中使用 node 内置的 fetch 函数获取外部数据。fetch 是一个基于 Promise 的函数,允许你向外部 API 发起 HTTP 请求。
const getCustomJwtClaims = async ({ environmentVariables }) => {
  const response = await fetch('https://api.example.com/data', {
    headers: {
      Authorization: `Bearer ${environmentVariables.API_KEY}`,
    },
  });

  const data = await response.json();

  return {
    data,
  };
};
请注意,任何外部数据获取都可能为令牌签发过程引入延迟。请确保外部 API 可靠且足够快速以满足你的需求。
此外:
- 在脚本中妥善处理错误和超时,避免令牌签发过程被阻塞。
- 使用合适的授权 (Authorization) 头保护你的外部 API,防止未授权访问。
第四步:测试脚本
在保存脚本前请务必进行测试。点击页面右侧的 测试上下文 标签,修改用于测试的模拟令牌负载和用户数据上下文。
点击编辑器右上角的 运行测试,即可用模拟数据运行脚本。脚本输出将在 测试结果 抽屉中展示。
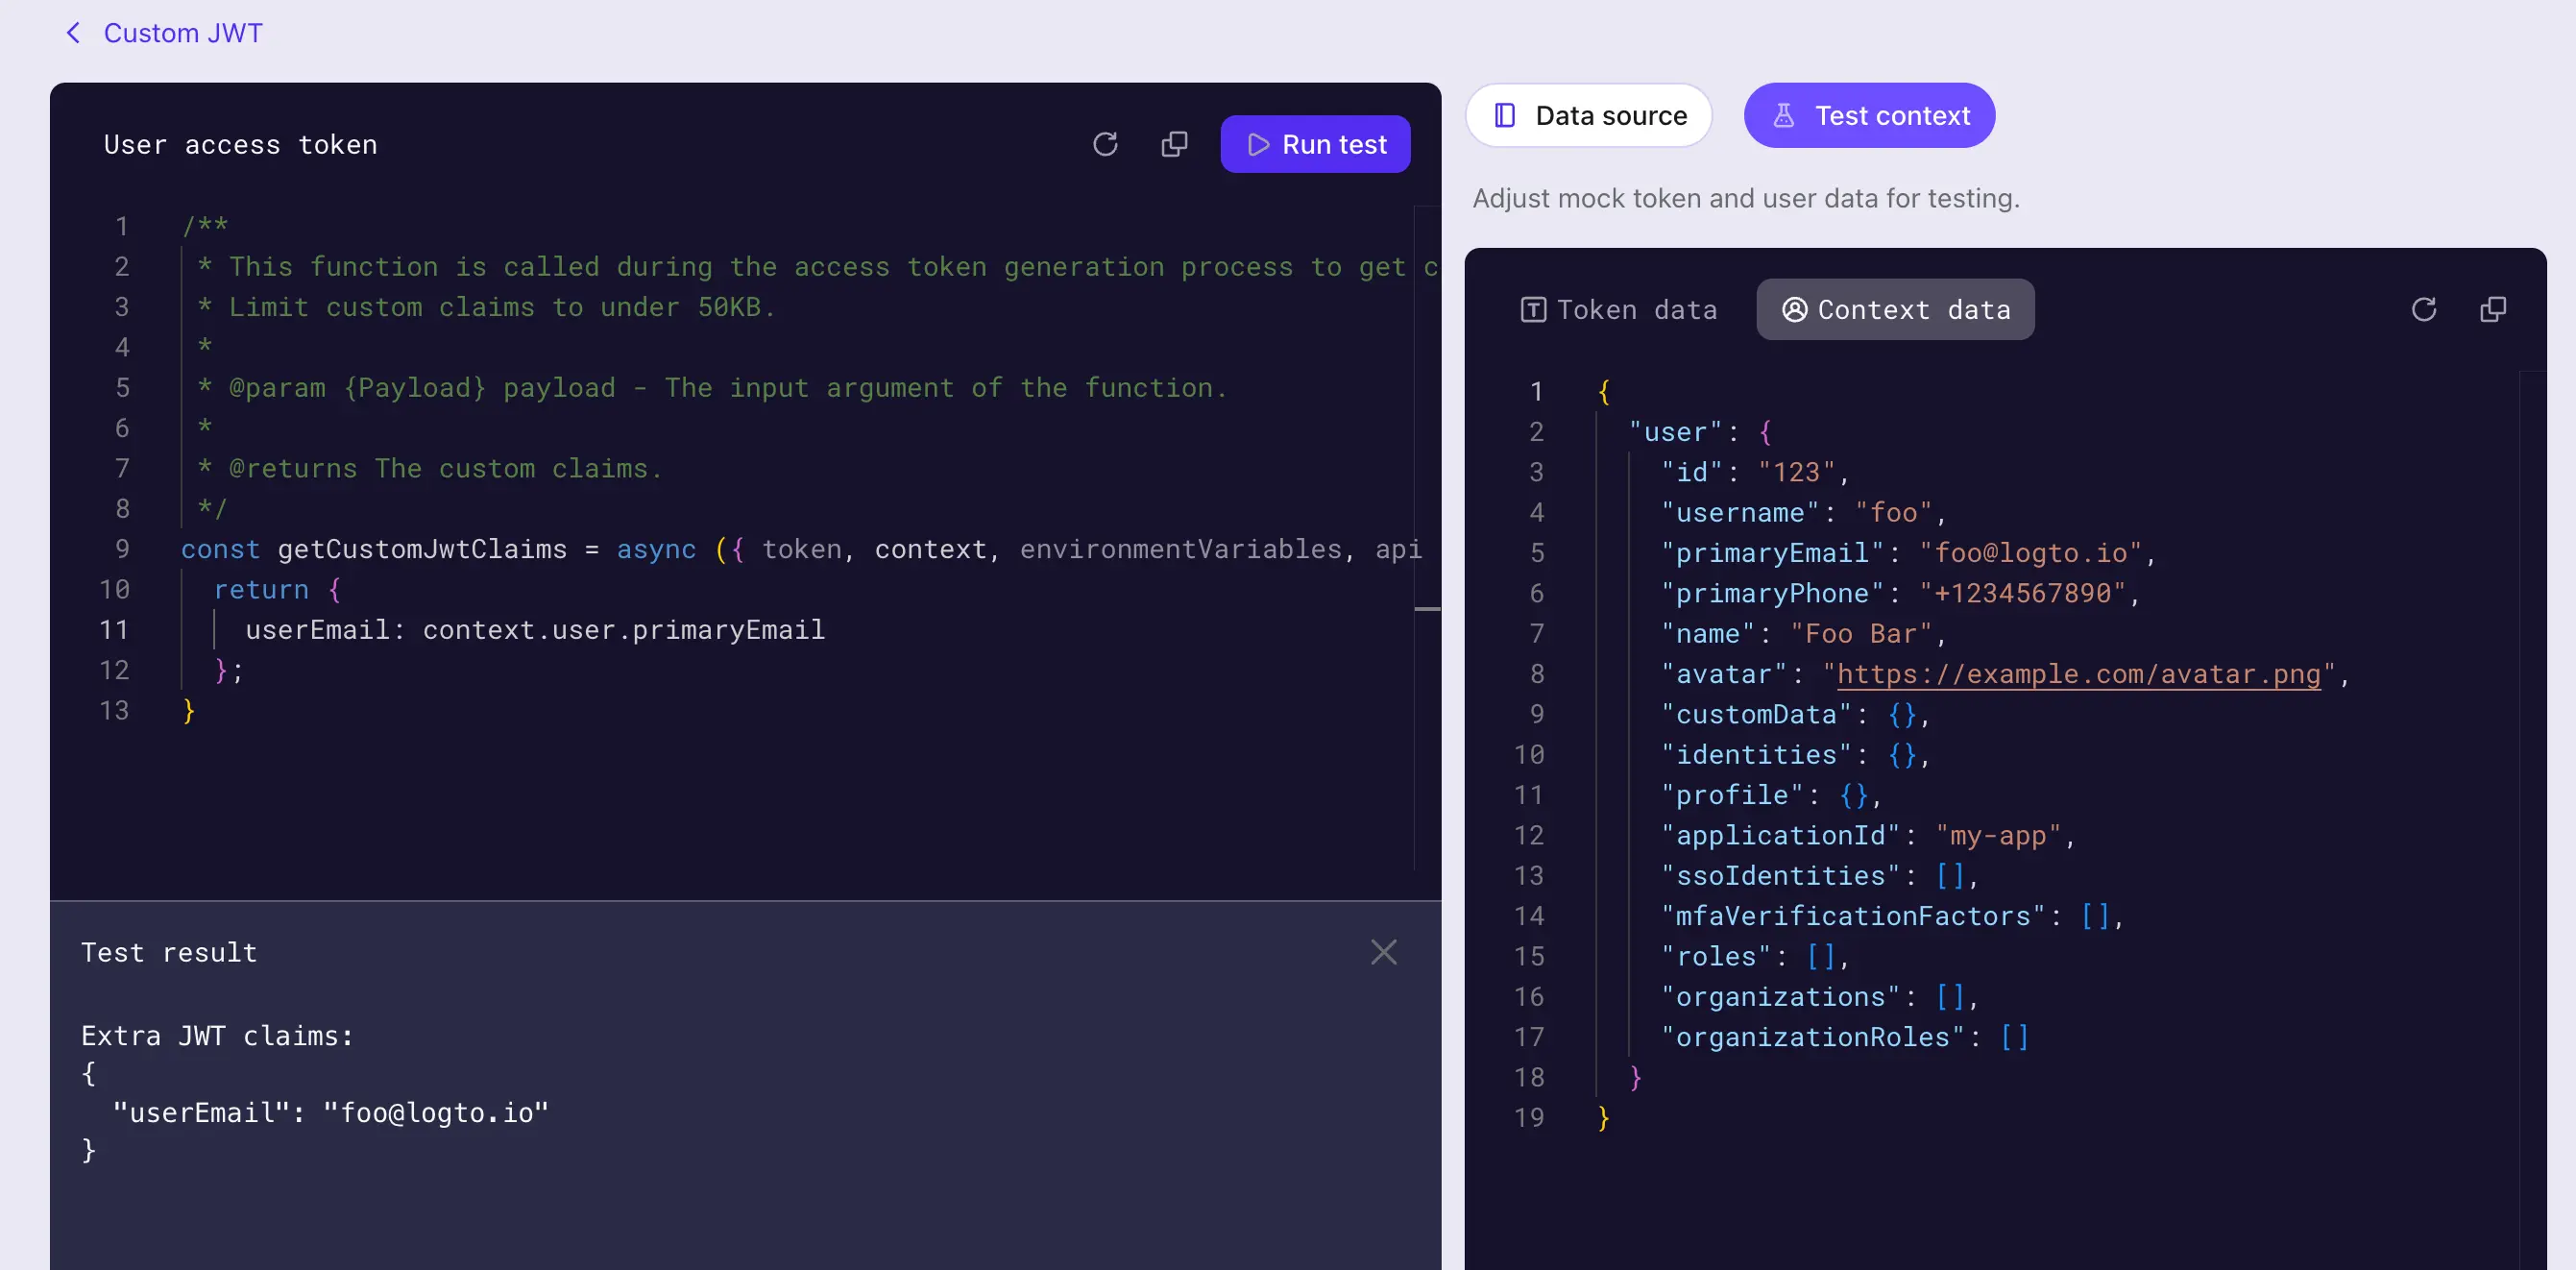
测试结果是你设置的模拟数据下 getCustomJwtClaims 函数的输出(即在时序图第 3 步完成后获得的“额外令牌声明 (Claims)”)。实际令牌负载和用户数据上下文在令牌签发过程中会有所不同。
点击 创建 按钮保存脚本。自定义令牌声明 (Claims) 脚本将被保存并应用于访问令牌 (Access token) 签发流程。