为你的 Passport.js 应用添加认证 (Authentication)
本指南将向你展示如何将 Logto 集成到你的应用中,使用 Passport.js 和 OIDC 策略。
- 在本指南中,我们假设你已经在项目中设置了带有会话的 Express。如果没有,请访问 Express.js 网站 开始使用。
先决条件
- 一个 Logto Cloud 账户或一个 自托管 Logto。
- 一个已创建的 Logto 传统应用。
- 一个已配置会话的 express 项目。查看 Express.js 网站。
安装
通过你喜欢的包管理器安装 Logto SDK:
- npm
- pnpm
- yarn
npm i passport passport-openidconnectpnpm add passport passport-openidconnectyarn add passport passport-openidconnect集成
使用 OIDC 策略初始化 Passport.js
import passport from 'passport';
import OpenIDConnectStrategy, { type Profile, type VerifyCallback } from 'passport-openidconnect';

const endpoint = '<your-logto-endpoint>';
const appId = '<your-application-id>';
const appSecret = '<your-application-secret>';

export default function initPassport() {
  passport.use(
    new OpenIDConnectStrategy(
      {
        issuer: `${endpoint}/oidc`,
        authorizationURL: `${endpoint}/oidc/auth`,
        tokenURL: `${endpoint}/oidc/token`,
        userInfoURL: `${endpoint}/oidc/me`,
        clientID: appId,
        clientSecret: appSecret,
        callbackURL: '/callback',
        scope: ['profile', 'offline_access'],
      },
      (issuer: string, profile: Profile, callback: VerifyCallback) => {
        callback(null, profile);
      }
    )
  );

  passport.serializeUser((user, callback) => {
    callback(null, user);
  });

  passport.deserializeUser(function (user, callback) {
    callback(null, user as Express.User);
  });
}
此代码使用 OpenIDConnectStrategy 初始化 Passport。序列化和反序列化方法是为了演示目的而设置的。
确保在你的应用中初始化并附加 Passport 中间件:
import initPassport from './passport';

// ... other code
initPassport();
// ... other code
app.use(passport.authenticate('session'));
// ... other code
配置重定向 URI
在我们深入细节之前,下面是终端用户体验的快速概览。登录流程可以简化为如下:
- 你的应用调用登录方法。
- 用户被重定向到 Logto 登录页面。对于原生应用,会打开系统浏览器。
- 用户完成登录后被重定向回你的应用(配置为重定向 URI)。
关于基于重定向的登录
- 此认证 (Authentication) 过程遵循 OpenID Connect (OIDC) 协议,Logto 强制执行严格的安全措施以保护用户登录。
- 如果你有多个应用程序,可以使用相同的身份提供商 (IdP)(日志 (Logto))。一旦用户登录到一个应用程序,当用户访问另一个应用程序时,Logto 将自动完成登录过程。
要了解有关基于重定向的登录的原理和好处的更多信息,请参阅 Logto 登录体验解释。
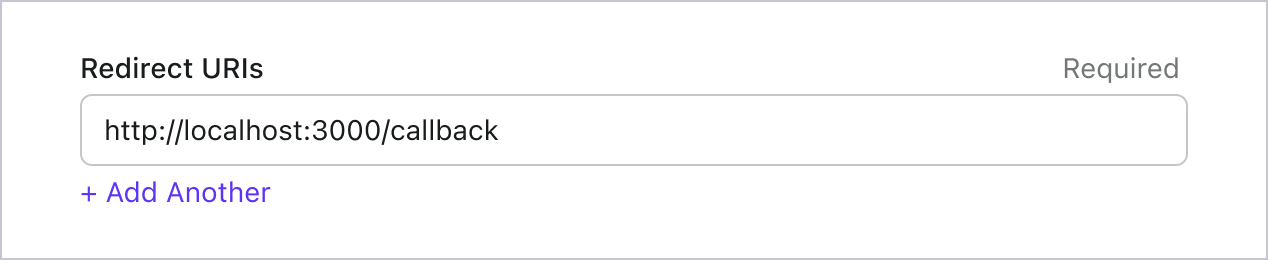
在以下代码片段中,我们假设你的应用程序运行在 http://localhost:3000/。
配置重定向 URI
切换到 Logto Console 的应用详情页面。添加一个重定向 URI http://localhost:3000/callback。
就像登录一样,用户应该被重定向到 Logto 以注销共享会话。完成后,最好将用户重定向回你的网站。例如,添加 http://localhost:3000/ 作为注销后重定向 URI 部分。
然后点击“保存”以保存更改。
实现登录和登出
我们现在将为认证过程创建特定的路由:
app.get('/sign-in', passport.authenticate('openidconnect'));
app.get(
  '/callback',
  passport.authenticate('openidconnect', {
    successReturnToOrRedirect: '/',
  })
);
app.get('/sign-out', (request, response, next) => {
  request.logout((error) => {
    if (error) {
      next(error);
      return;
    }
    response.redirect(`${endpoint}/oidc/session/end?client_id=${appId}`);
  });
});
然后添加到主页
app.get('/', (request: Request, response) => {
  const { user } = request;
  response.setHeader('content-type', 'text/html');

  if (user) {
    response.end(
      `<h1>Hello Logto</h1><p>Signed in as ${JSON.stringify(
        user
      )}, <a href="/sign-out">Sign Out</a></p>`
    );
  } else {
    response.end(`<h1>Hello Logto</h1><p><a href="/sign-in">Sign In</a></p>`);
  }
});
检查点:测试你的应用程序
现在,你可以测试你的应用程序:
- 运行你的应用程序,你将看到登录按钮。
- 点击登录按钮,SDK 将初始化登录过程并将你重定向到 Logto 登录页面。
- 登录后,你将被重定向回你的应用程序,并看到登出按钮。
- 点击登出按钮以清除令牌存储并登出。
权限 (Scopes) 和声明 (Claims)
Logto 使用 OIDC 权限 (Scopes) 和声明 (Claims) 约定 来定义用于从 ID 令牌 (ID token) 和 OIDC userinfo 端点 获取用户信息的权限 (Scopes) 和声明 (Claims)。"scope" 和 "claim" 都是 OAuth 2.0 和 OpenID Connect (OIDC) 规范中的术语。
对于标准 OIDC 声明 (Claims),其在 ID 令牌 (ID token) 中的包含严格由所请求的权限 (Scopes) 决定。扩展声明 (Claims)(如 custom_data 和 organizations)可以通过 自定义 ID 令牌 (Custom ID token) 设置额外配置到 ID 令牌 (ID token) 中。
简而言之,当你请求某个权限 (Scope) 时,你将在用户信息中获得相应的声明 (Claims)。例如,如果你请求 `email` 权限 (Scope),你将获得用户的 `email` 和 `email_verified` 数据。
默认情况下,Logto SDK 总是会请求三个权限 (Scopes):`openid`、`profile` 和 `offline_access`,并且无法移除这些默认权限 (Scopes)。但你可以在配置 Logto 时添加更多权限 (Scopes):
export default function initPassport() {
  passport.use(
    new OpenIDConnectStrategy(
      {
        // ... other options
        clientID: appId,
        clientSecret: appSecret,
        callbackURL: '/callback',
        scope: ['openid', 'offline_access', 'profile', 'email'],
      }
      // ... other options
    )
  );
  // ... other options
}
以下是支持的权限 (Scopes) 及其对应的声明 (Claims) 列表:
标准 OIDC 权限 (Scopes)
openid(默认)
| Claim name | Type | Description |
|---|---|---|
| sub | string | 用户的唯一标识符 |
profile(默认)
| Claim name | Type | Description |
|---|---|---|
| name | string | 用户的全名 |
| username | string | 用户名 |
| picture | string | 终端用户头像的 URL。该 URL 必须指向一个图片文件(例如 PNG、JPEG 或 GIF 图片文件),而不是包含图片的网页。请注意,该 URL 应专门指向适合在描述终端用户时显示的头像,而不是终端用户拍摄的任意照片。 |
| created_at | number | 终端用户创建的时间。该时间以自 Unix 纪元(1970-01-01T00:00:00Z)以来的毫秒数表示。 |
| updated_at | number | 终端用户信息最后更新时间。该时间以自 Unix 纪元(1970-01-01T00:00:00Z)以来的毫秒数表示。 |
其他 标准声明 (Claims) 包括 family_name、given_name、middle_name、nickname、preferred_username、profile、website、gender、birthdate、zoneinfo 和 locale 也会包含在 profile 权限 (Scope) 中,无需请求 userinfo 端点。与上表声明 (Claims) 不同的是,这些声明 (Claims) 仅在其值不为空时返回,而上表声明 (Claims) 的值为空时会返回 null。
与标准声明 (Claims) 不同,created_at 和 updated_at 声明 (Claims) 使用的是毫秒而不是秒。
email
| Claim name | Type | Description |
|---|---|---|
string | 用户的电子邮件地址 | |
| email_verified | boolean | 电子邮件地址是否已被验证 |
phone
| Claim name | Type | Description |
|---|---|---|
| phone_number | string | 用户的电话号码 |
| phone_number_verified | boolean | 电话号码是否已被验证 |
address
关于 address 声明 (Claim) 的详细信息,请参阅 OpenID Connect Core 1.0。
带有 (默认) 标记的权限 (Scopes) 总是由 Logto SDK 请求。当请求相应权限 (Scope) 时,标准 OIDC 权限 (Scopes) 下的声明 (Claims) 总是包含在 ID 令牌 (ID token) 中——无法关闭。
扩展权限 (Scopes)
以下权限 (Scopes) 由 Logto 扩展,并将通过 userinfo 端点 返回声明 (Claims)。这些声明 (Claims) 也可以通过 控制台 > 自定义 JWT 配置为直接包含在 ID 令牌 (ID token) 中。详见 自定义 ID 令牌 (ID token)。
custom_data
| Claim name | Type | Description | Included in ID token by default |
|---|---|---|---|
| custom_data | object | 用户的自定义数据 |
identities
| Claim name | Type | Description | Included in ID token by default |
|---|---|---|---|
| identities | object | 用户关联的身份 | |
| sso_identities | array | 用户关联的 SSO 身份 |
roles
| Claim name | Type | Description | Included in ID token by default |
|---|---|---|---|
| roles | string[] | 用户的角色 (Roles) | ✅ |
urn:logto:scope:organizations
| Claim name | Type | Description | Included in ID token by default |
|---|---|---|---|
| organizations | string[] | 用户所属的组织 (Organizations) ID | ✅ |
| organization_data | object[] | 用户所属的组织 (Organizations) 数据 |
这些组织 (Organizations) 声明 (Claims) 也可以在使用 不透明令牌 (Opaque token) 时通过 userinfo 端点获取。但不透明令牌 (Opaque tokens) 不能作为组织令牌 (Organization tokens) 用于访问组织专属资源。详见 不透明令牌 (Opaque token) 与组织 (Organizations)。
urn:logto:scope:organization_roles
| Claim name | Type | Description | Included in ID token by default |
|---|---|---|---|
| organization_roles | string[] | 用户所属组织 (Organizations) 的角色 (Roles),格式为 <organization_id>:<role_name> | ✅ |